Sigo preparando mi “kit portátil” de labores. Esta vez toca el costurero de viaje.
I keep on preparing my needlecraft “portable kit”. Now is time for the travel sewing case.
Necesitamos telas, entretela, guata, fieltro y bies.
We need some fabrics, interlining, wadding, felt and bies.
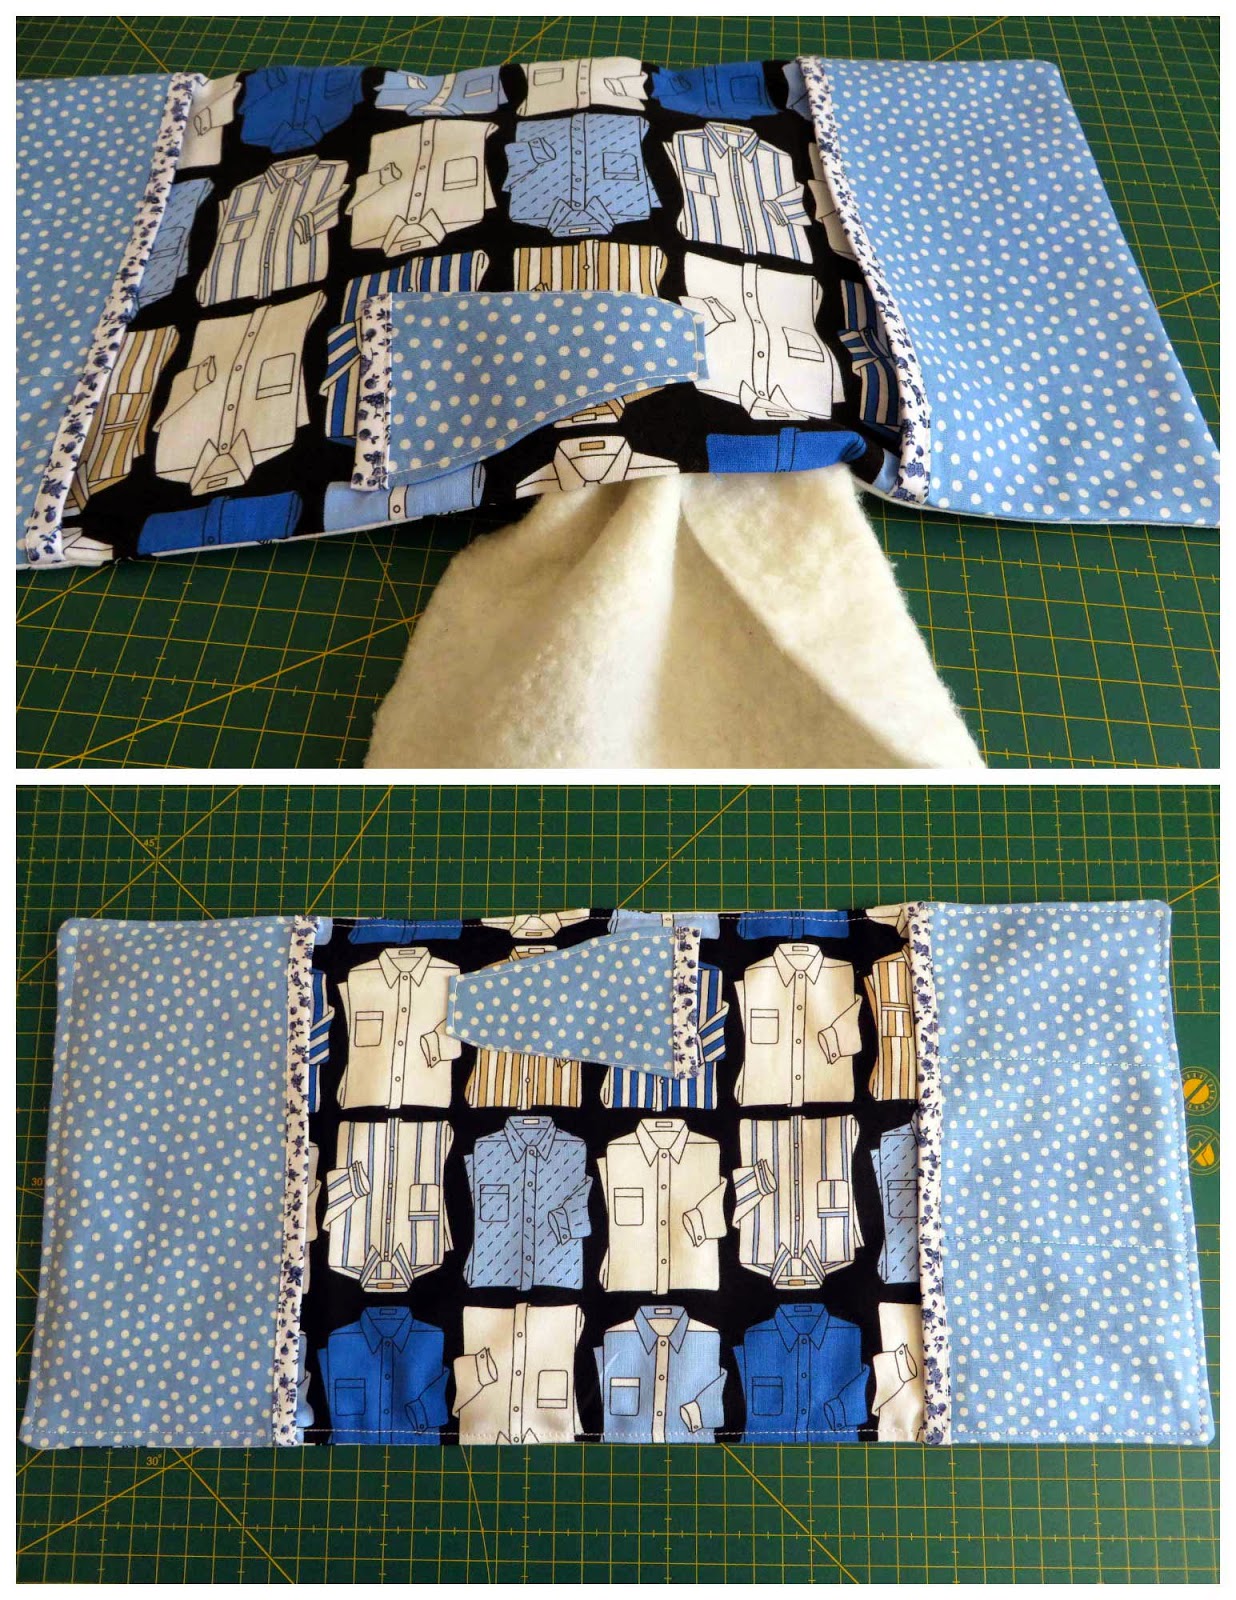
1– Las medidas de mi costurero son de 42 cm x 20 cm. Tiene dos bolsillos de 10 cm x 20 cm y un bolsillo para las tijeras. Se dobla en tres partes de 14 cm.
1- The dimensions of my sewing case are 16.4’’ x 7.8’’. It has two pockets of 3.9’’ x 7.8’’ and a pocket for the scissors. It folds into three 5.5’’ parts.
Por tanto, cortamos: en tela y con margen, dos piezas de 42 cm x 20 cm, otras dos de 10 cm x 20 cm y el bolsillo de las tijeras con el patrón que tenéis aquí; en guata, una pieza de 42 cm x 20 cm y en entretela, dos piezas de 10 cm x 20 cm y el patrón del bolsillo de las tijeras.
Therefore, let’s cut: two fabric pieces of 16.4’’ x 7.8’’ and two of 3.9’’ x 7.8’’, both leaving a margin, and the pocket for the scissors with the pattern that you have here; a wadding piece of 42 cm x 20 cm and two interlining pieces 3.9’’ x 7.8’’ and the pattern for the pocket of the scissors.
2– Si empleáis entretela adhesiva comenzamos pegándola con la plancha en las piezas de los bolsillos. Si no, la cosemos con las telas más tarde. Después cosemos un bies en el borde a las tres piezas.
2- If you use adhesive interlining, start by sticking it with the iron on the pieces of the pockets. If you don’t, sew it with the fabrics later. Next, sew a bies on the edge of the three pieces.
3– Colocamos los bolsillos según el patrón, cosemos el bolsillo de las tijeras y dividimos uno de los bolsillos laterales en tres apartados haciendo dos pespuntes. A continuación ponemos la pieza de tela exterior encarándola con la interior por el derecho y cosemos ambas piezas junto con los bolsillos laterales, dejando un hueco para darle la vuelta, tras lo cual planchamos bien los bordes.
3- Place the pockets following the pattern, sew the pocket for the scissors and divide one of the lateral pockets into three parts making two backstitches. Then put the outside piece of fabric with the inside piece facing both right sides and sew them together with the side pockets, leaving an unstitched part to turn the inside out, after which iron the edges well.
4– Introducimos la guata por el hueco que hemos dejado y cosemos un pespunte por todo el borde.
4- Introduce the wadding through the hole you have left and sew a backstitch at all the edge.
5– Para guardar las agujas he añadido un trozo de fieltro con forma de bolsillo a juego con la tela (hacedlo como os guste). Y finalmente he puesto un broche de presión para cerrar el costurero. Podéis utilizar cualquier otra cosa.
5- For keeping the needles, I have added a piece of felt as the shape of a pocket matching the fabric (do it as you like). And finally I’ve also put a snap fastener to close the sewing case. You can use any other thing.
4 comentarios
Gracias. Siempre nos enseñas algo.
@Carmen Soria De nada. Gracias a ti por animarme. Me alegro de que te guste.
¡Saludos!
Chulisimo !!!!!!!!! gracias por el tutorial tan bien explicado ,besitos guapa.
@Montse Gracias a ti, Montse. A veces no sé si me explico bien.
¡Besos!


4 comentarios
Gracias. Siempre nos enseñas algo.
@Carmen Soria De nada. Gracias a ti por animarme. Me alegro de que te guste.
¡Saludos!
Chulisimo !!!!!!!!! gracias por el tutorial tan bien explicado ,besitos guapa.
@Montse Gracias a ti, Montse. A veces no sé si me explico bien.
¡Besos!